HTTPS 学习
运行 https server :
openssl 生成私钥和证书
生成 rsa 私钥 server.key :
1 | root@ubuntu:~/test# openssl genrsa -out server.key 2048 |
根据私钥生成 证书申请文件 server.csr :
1 | root@ubuntu:~/test# openssl req -new -key server.key -out server.csr |
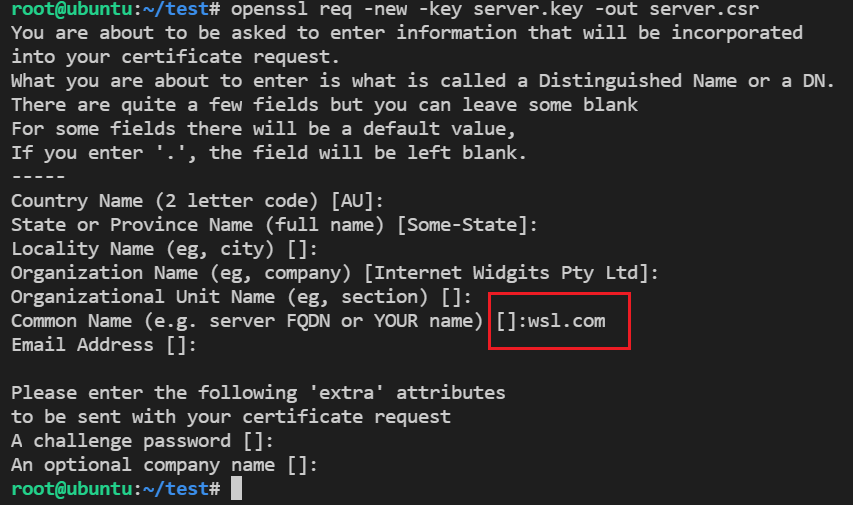
指定给 wsl.com 这个域名颁发的证书
然后生成一个 CA 根证书(自签名x509 ):
用私钥对 证书申请进行签名,从而生成证书 server.crt:
1 | root@ubuntu:~/test# openssl x509 -req -in server.csr -out server.crt -signkey server.key -days 3650 |
有效期为 10年
**根证书可以直接用作 服务器证书 **
python https server:
1 | from http.server import HTTPServer, BaseHTTPRequestHandler |
然后访问:
1 | inhann@ubuntu:~$ curl https://wsl.com:4443 --cacert /home/inhann/test/server.crt |
golang 的 https server:
1 | package main |
访问:
1 | inhann@ubuntu:~$ curl https://wsl.com:4443 --cacert /home/inhann/test/server.crt |
也可以直接忽略:
1 | inhann@ubuntu:~$ curl https://wsl.com:4443 -k |
使用 openssl 生成证书:
生成根证书:
首先生成 private key :
1 | inhann@ubuntu:~/test$ openssl genrsa -out root.key 2048 |
然后生成一个 CA 证书请求:
1 | inhann@ubuntu:~/test$ openssl req -new -key root.key -out root.csr |
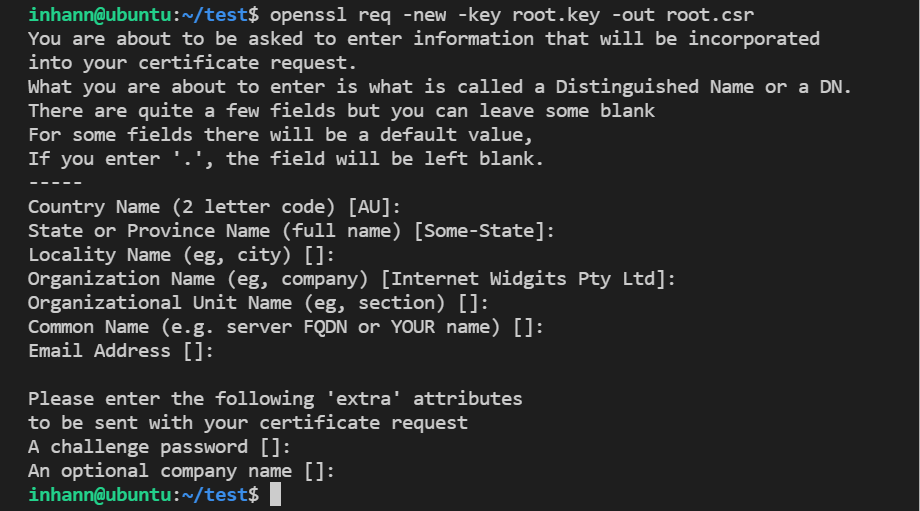
可以全部都回车
然后自签名生成证书:
1 | inhann@ubuntu:~/test$ openssl x509 -req -days 365 -in root.csr -signkey root.key -out root.crt |
服务器证书生成:
生成 private key server.key:
1 | inhann@ubuntu:~/test$ openssl genrsa -out server.key 2048 |
生成 csr server.csr :
1 | inhann@ubuntu:~/test$ openssl req -new -key server.key -out server.csr |
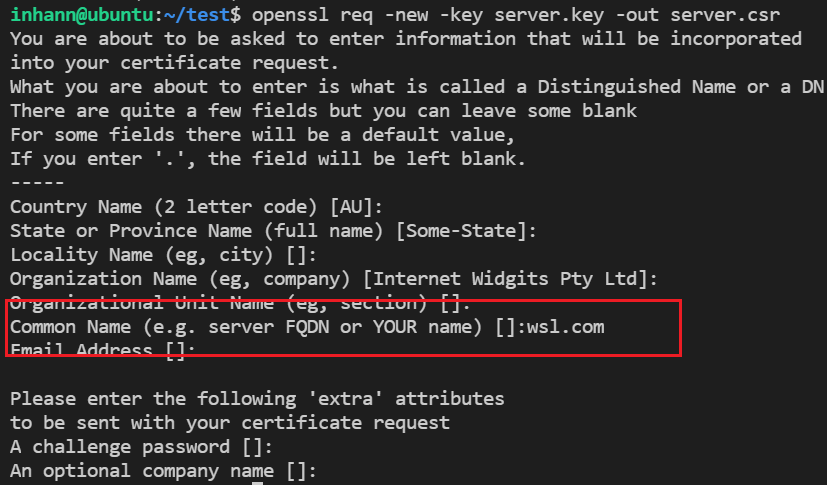
作为服务器端,最重要的是 Common Name ,这个字段代表了 与服务器关联的 域名,或者是 IP
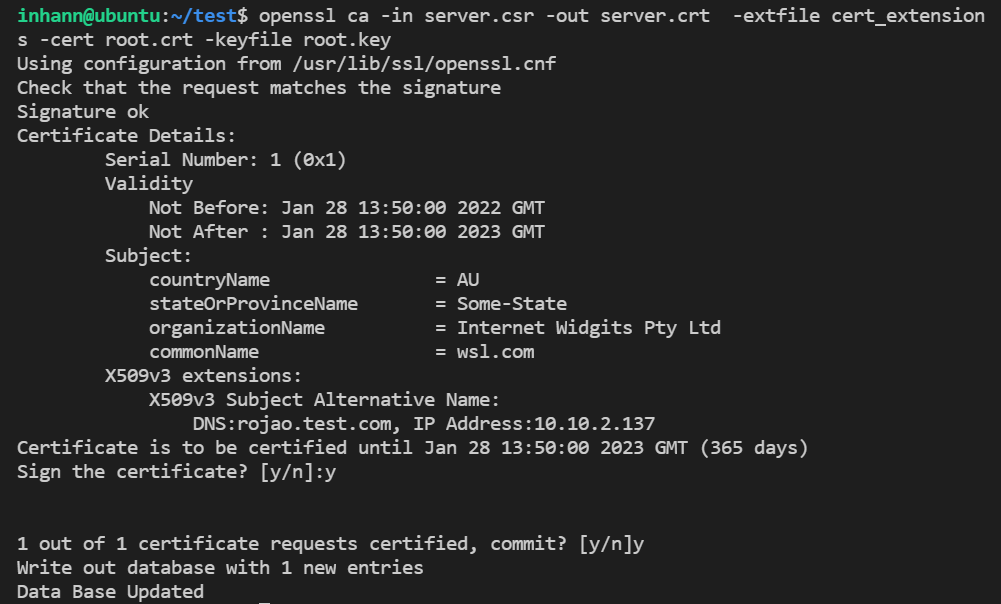
然后用根证书签发 服务端证书 server.crt:
方法一
1 | inhann@ubuntu:~/test$ openssl ca -in server.csr -out server.crt -cert root.crt -keyfile root.key |
应对报错:
1 | mkdir ./demoCA/newcerts -p |
方法二
也可以自签的形式,通过 -CA 等参数指定根证书:
1 | inhann@ubuntu:~/test$ openssl x509 -req -days 365 -in server.csr -signkey server.key -out server.crt -CA root.crt -CAkey root.key -CAcreateserial |
实验:
跑一个 https server ,用 server.key 作为 rsa private key ,用 server.crt 作为 服务器证书
1 | /home/inhann/test/https.py:12 |
可以指定用的根证书为 root.crt 然后访问:
1 | inhann@ubuntu:~$ curl https://wsl.com:4443 --cacert /home/inhann/test/root.crt |
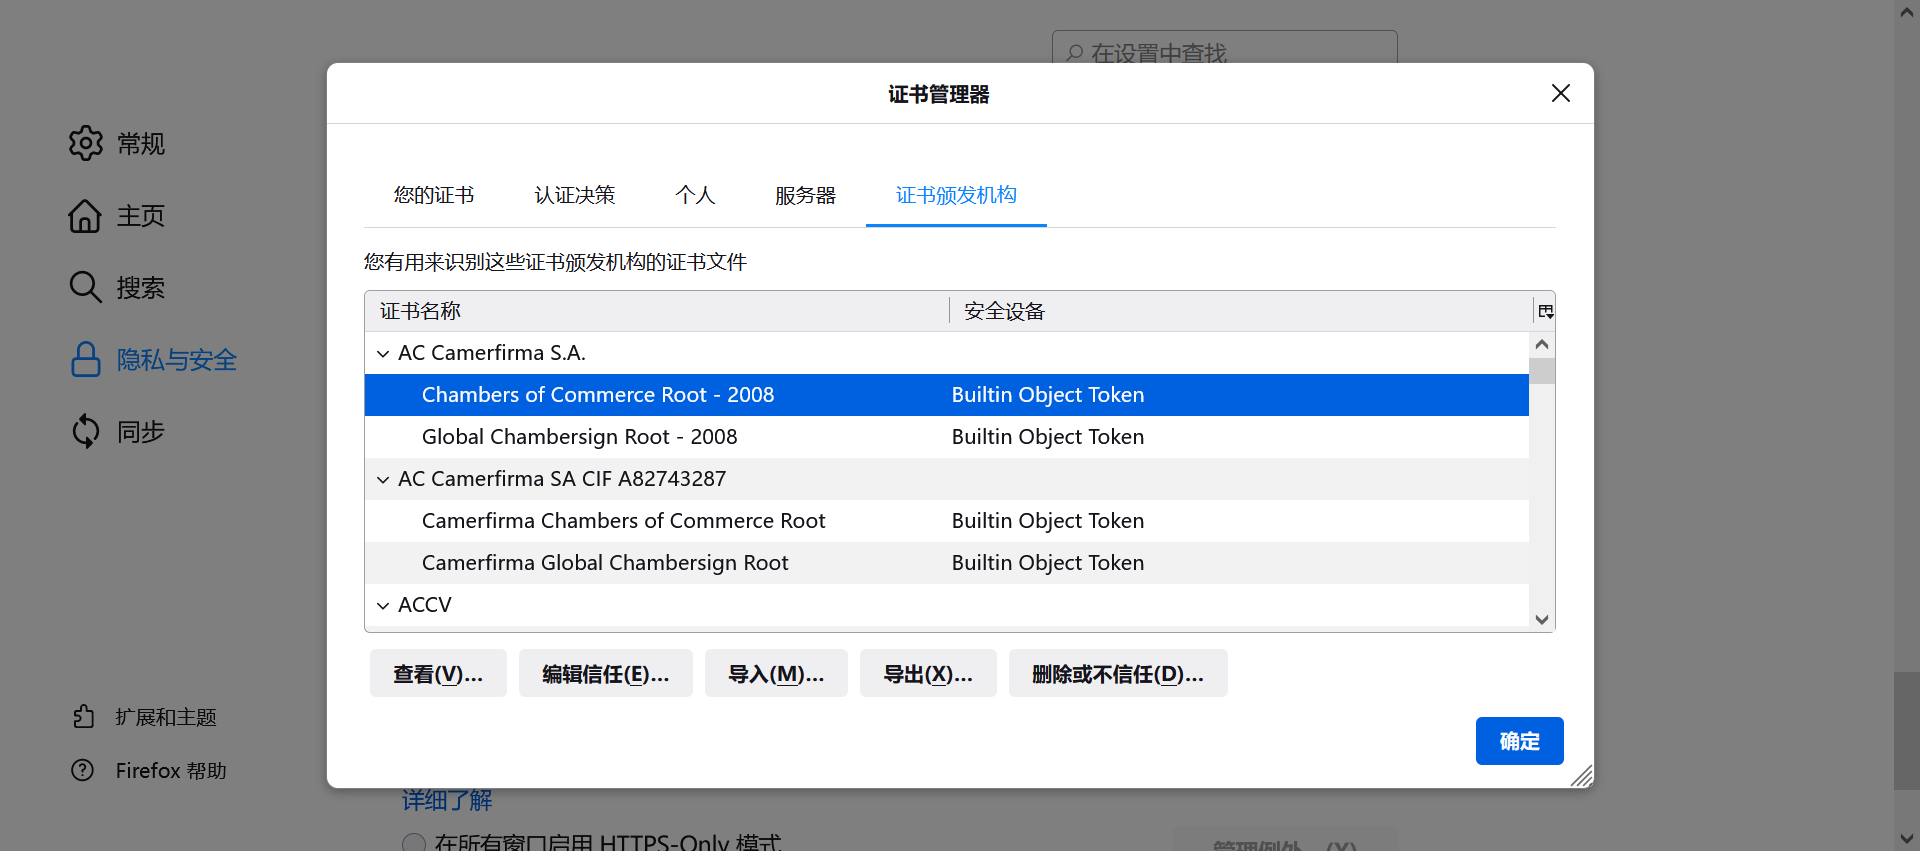
把根证书 root.crt 安装到浏览器 :
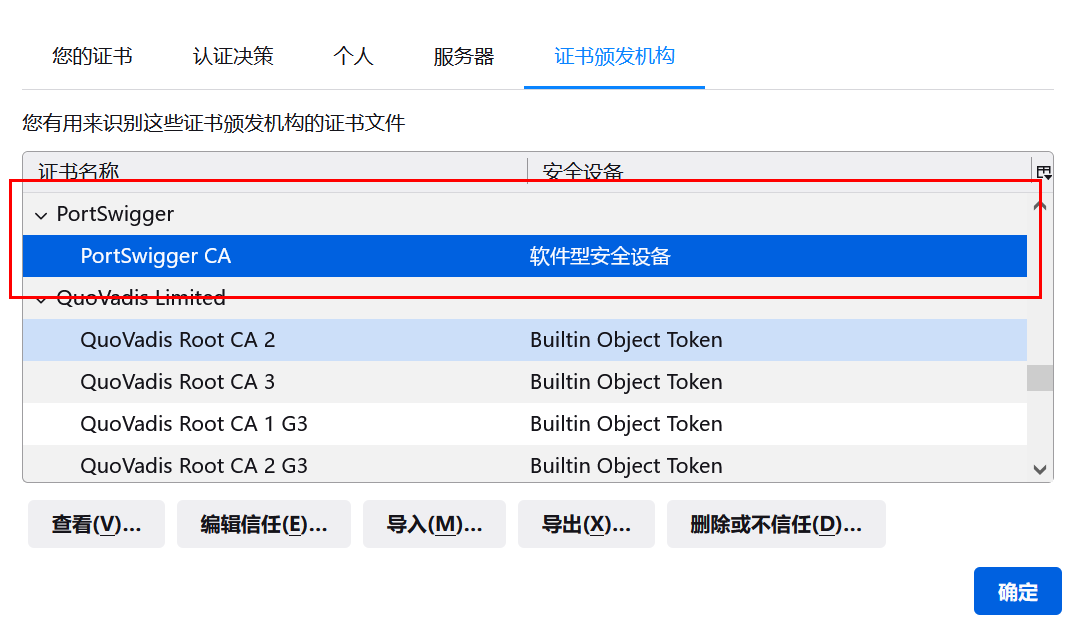
在证书颁发机构这边,导入:
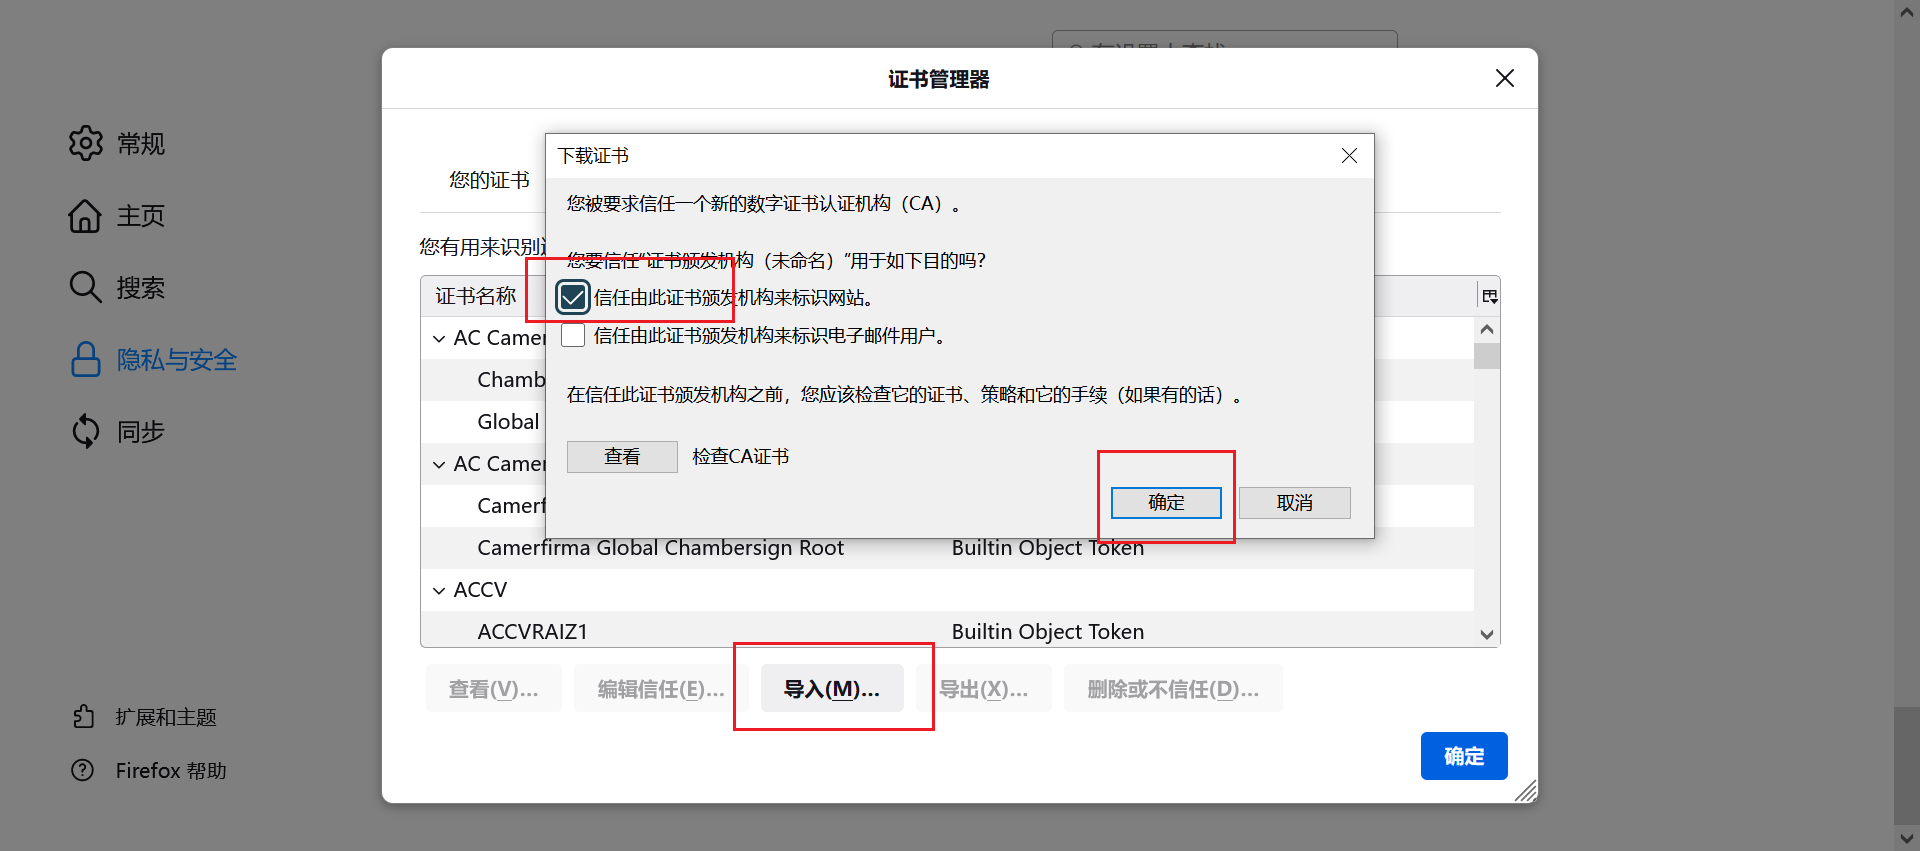
可以看到 根证书被导入了:
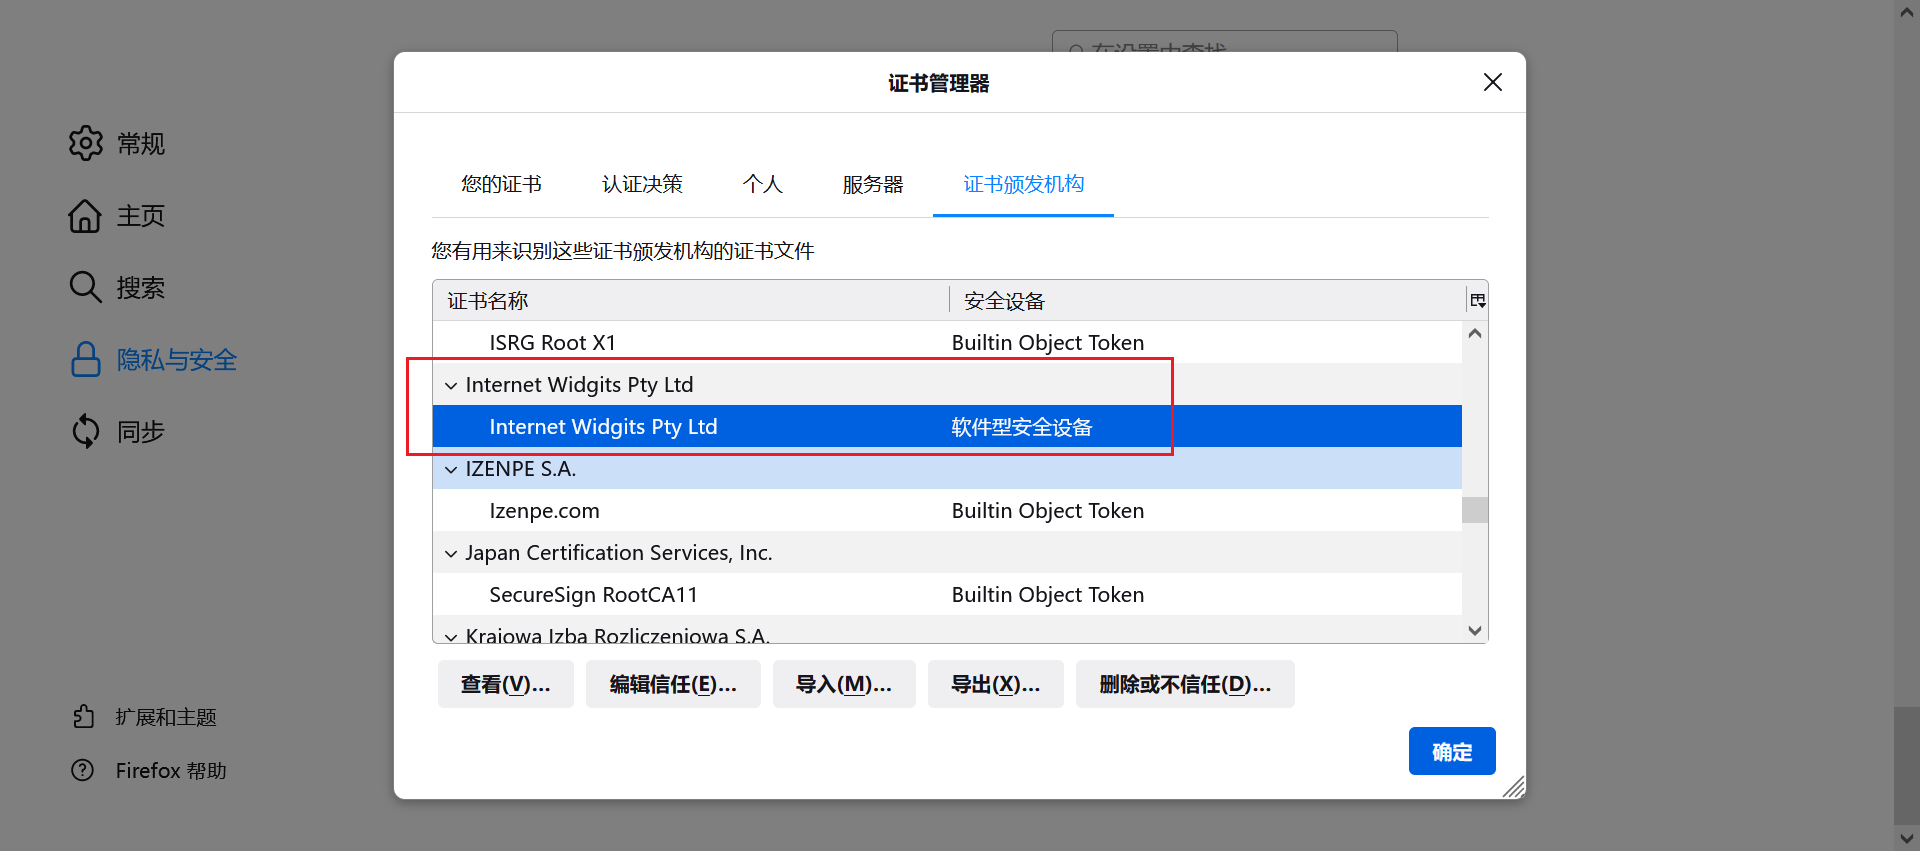
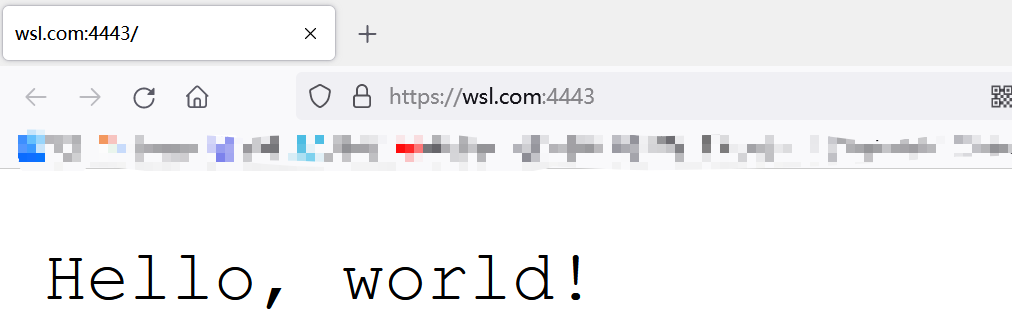
然后就可以直接 访问 https ,而不会被拦截了:
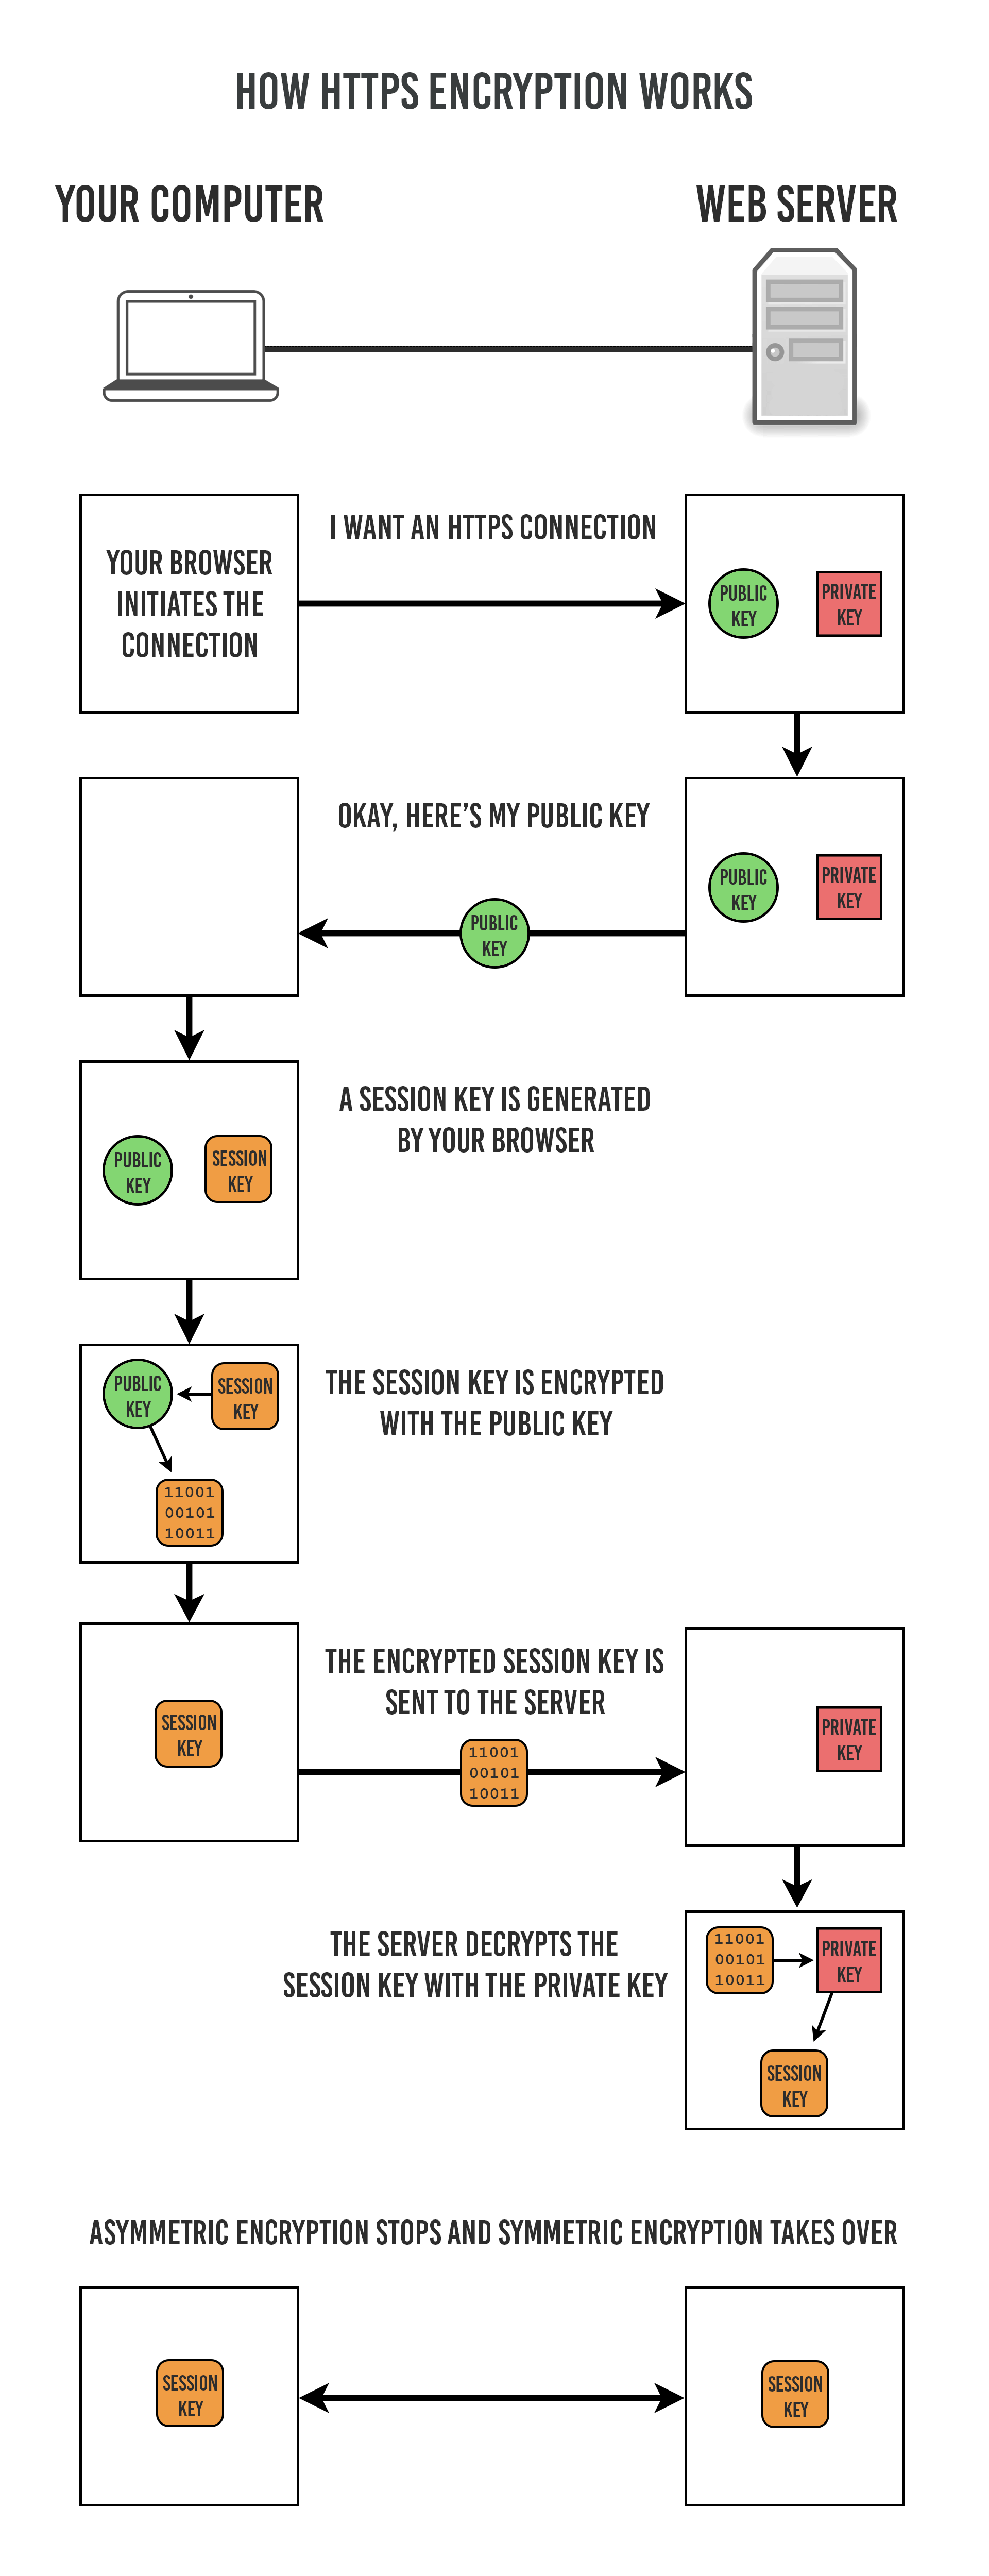
https 的 加解密机制 ( Public Key Infrastructure , PKI ):
https 保证了 浏览器 和 web server 之间通信的保密性
both types of encryption are used. Asymmetric (public key) encryption is used first to establish the connection, which is then replaced with symmetric encryption (called the session) for the duration.
两种加密方式(对称、非对称)都会使用,非对称主要用于建立连接,对称用于数据的加密传输
以下是浏览器通过 https 和 web server 交互的具体过程:
Your browser reaches out to the website server and requests a connection.
首先,浏览器向 web server 发起建立连接的请求
The server sends you its public key. It keeps its private key a secret.
web server 上面保存着一对 public key 和 private key ,web server 把 public key 传给浏览器
Your browser generates a third key called a session key.
浏览器生成一个 session key ,这个key 是用于对称加密的
The session key is encrypted by your computer using the public key you got from the server
然后 浏览器把通过 public key 这个 session key 进行加密
The encrypted session key is then shared with the server.
加密后的 session key 被传输给 web server
The server decrypts the session key that it received from you using the secret private key. Now both ends have the session key that your computer generated.
web server 用 private key 进行解密,拿到 session key
The public key encryption is terminated and replaced with symmetric encryption.
public key encryption此时就结束了,接下来都是对称加密Now you are in a session with the server using only symmetric encryption, and that’s how it remains until you leave the website.
现在 server 和 浏览器的 交互都通过 对称加密进行
只使用 一次 非对称加密的理由:
- 非对称加密是单向的。所有人都有 public key ,所以 web server 如果用 private key 对数据加密后传输,所有人都能截获然后解密。
- 非对称加密要更多算力。非对称加密用的 public key 非常长,处理起来很慢
数字签名:
数字签名生成:
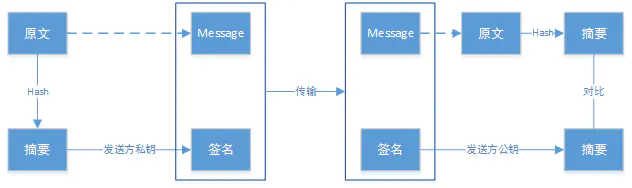
首先对 message 进行摘要算法处理(md5 、sha),生成摘要,然后将 摘要 用 private key 加密,加密后的摘要就是 数字签名
用数字签名确保 message 的完整性和抗否认性:
message 和 数字签名一同到达,接受者 对message 进行 相同的摘要算法,生成摘要A,利用 public key 将数字签名的解密生成B。然后将A 和 B进行对比,看看是否相同,从而可以保证信息的完整性和抗否认性。
域名对应网站的安全性检查:
服务器证书申请:
Certificate Authorities,又叫做 CA 机构,申请者将 身份信息 message 交给 CA 机构,CA 机构在 核实了 信息之后,将 message 进行摘要,然后用 CA private key 将 摘要进行加密,生成 数字签名
如果申请通过,一般申请者会拿到两个东西:
- rsa private key ( server.key )(或者其他的,非对称加密算法的 私钥)
- 服务端证书 ( server.crt )
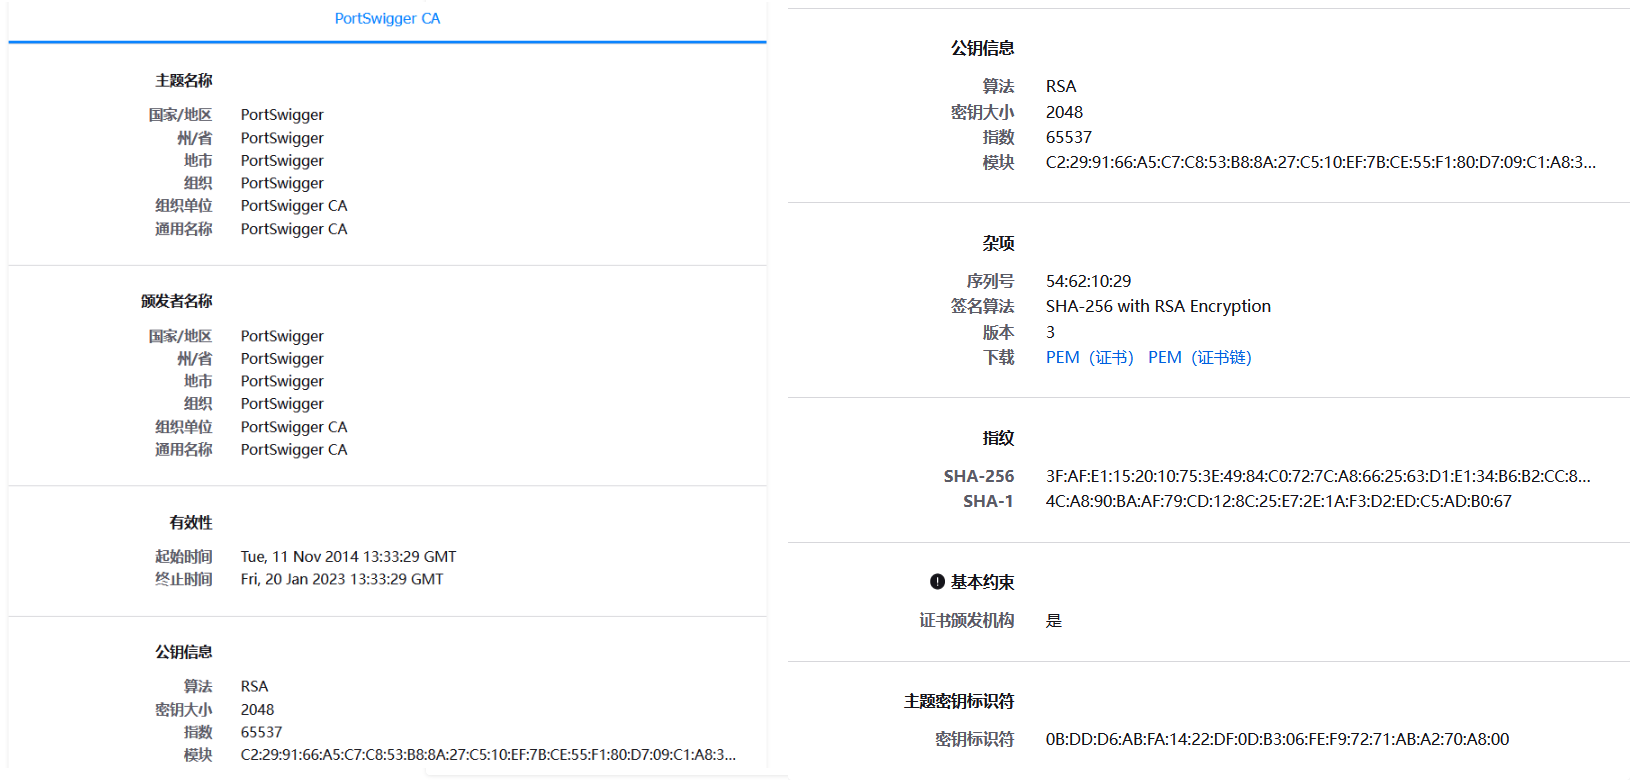
服务端证书的内容,包括:
- 摘要 message 用的 哈希算法
- 生成 数字签名用的 非对称加密算法
- CA 机构的名称(颁发者)
- 数字证书的有效期
- 使用者(一般是一个域名)
- rsa public key
- 指纹,即 message 的 数字签名
- message 本身
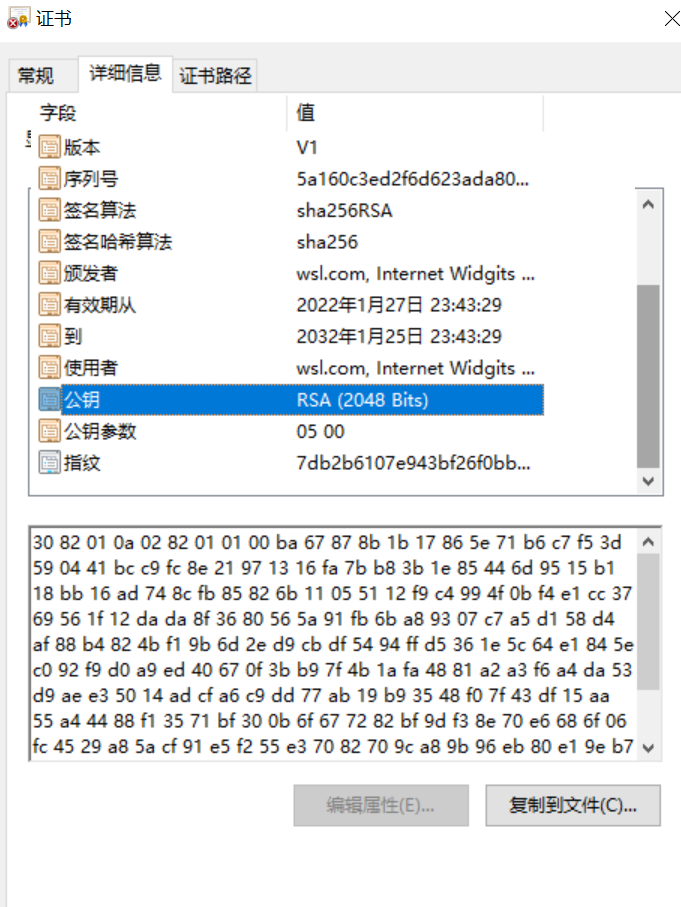
服务端证书(server.crt) 会从 web server 发送到浏览器,里面带着 rsa public key
而浏览器需要对 发过来的 服务端数字证书做 有效性验证:
首先判定收到的证书的颁布来源,然后根据颁布来源,在本地 证书库中,找到对应的 根证书(这些证书是浏览器预装的),进行验证:
这些预装的 根端证书(root.crt) 的内容,和服务端数字证书的格式是一样的:
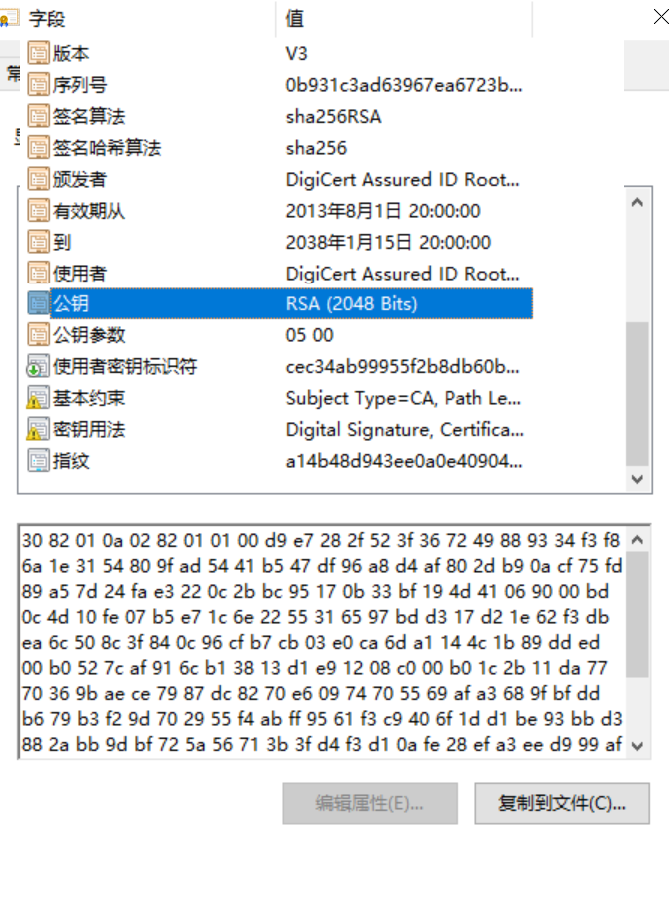
不过这里的 公钥,是和 CA private key (root.key) 对应的 CA public key
验证有效性的方法:
对收到的 server.crt 的指纹部分(即数字签名),用对应的 CA public key 进行解密,然后对 server.crt 的 message 进行摘要,最后比对 二者的结果,如果相同,那就有效,否则收到的数字证书无效
burpsuite 使用 https :
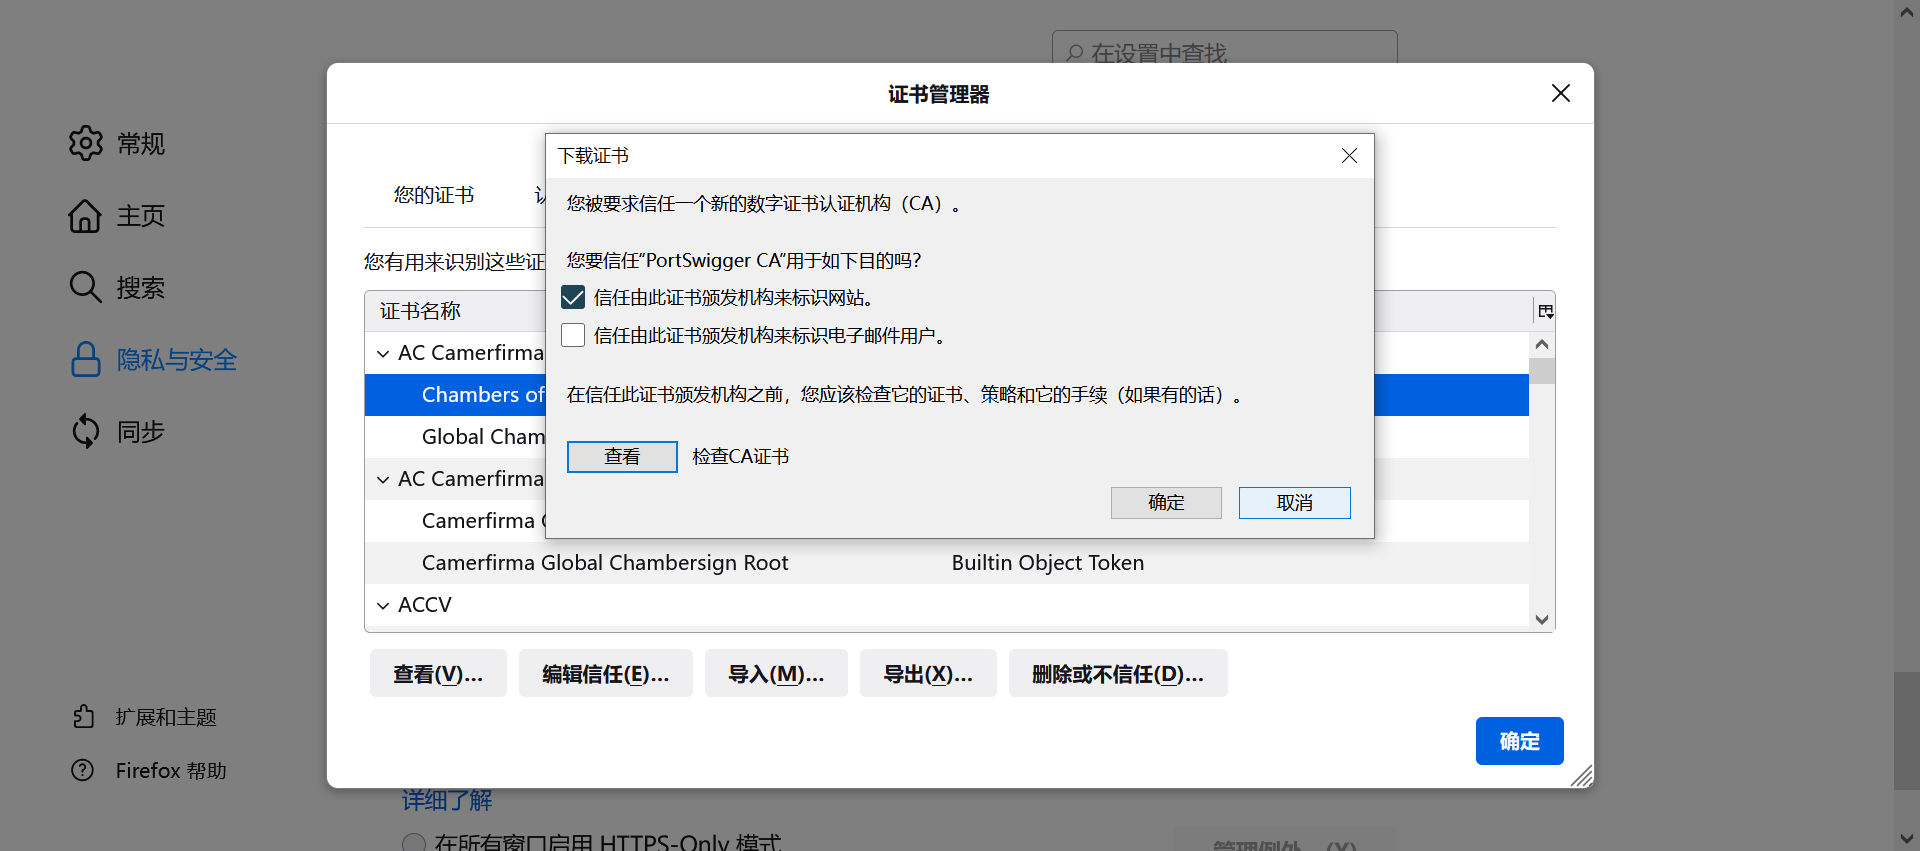
下载 burpsuite 提供的证书,然后装到火狐浏览器上面,可以认为这是一个 根证书:
当 burpsuite 处理 https 的时候:
首先浏览器发送的 http 报文被传送到 burpsuite,burpsuite 也会检测到它接下来 要交互的是一个 https server
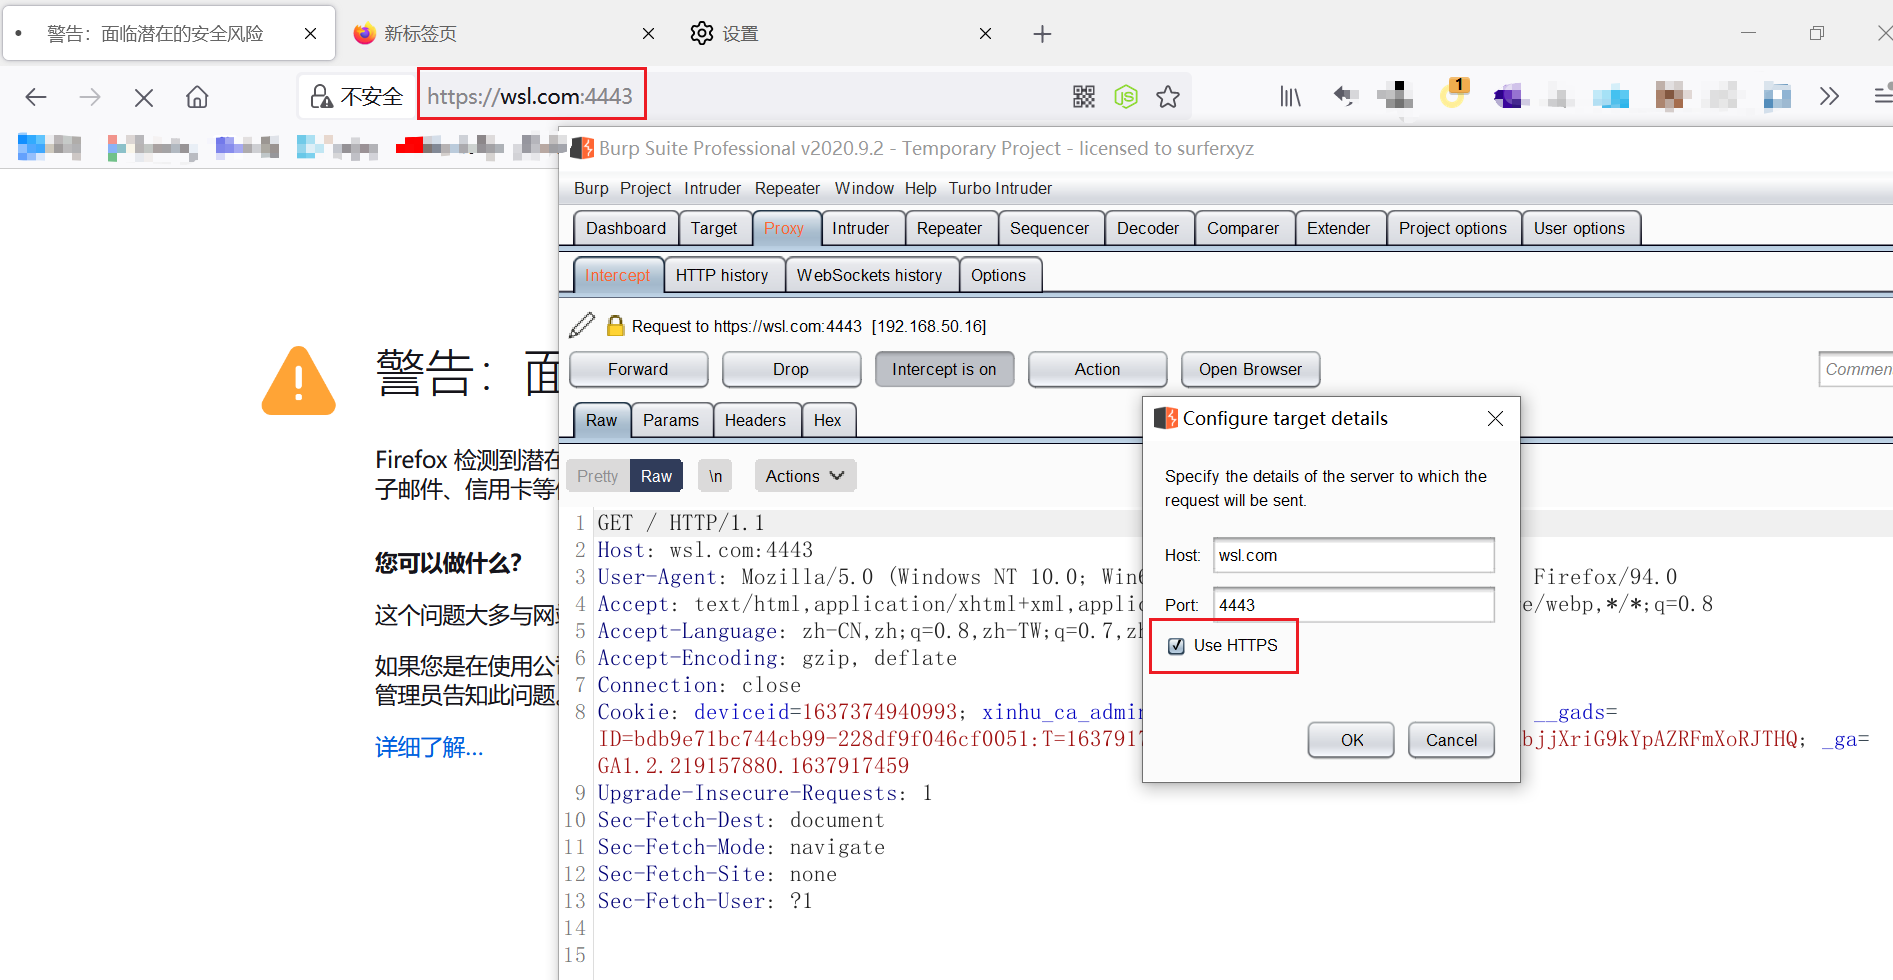
这时候,浏览器并没有去请求 web server 的 服务器证书:
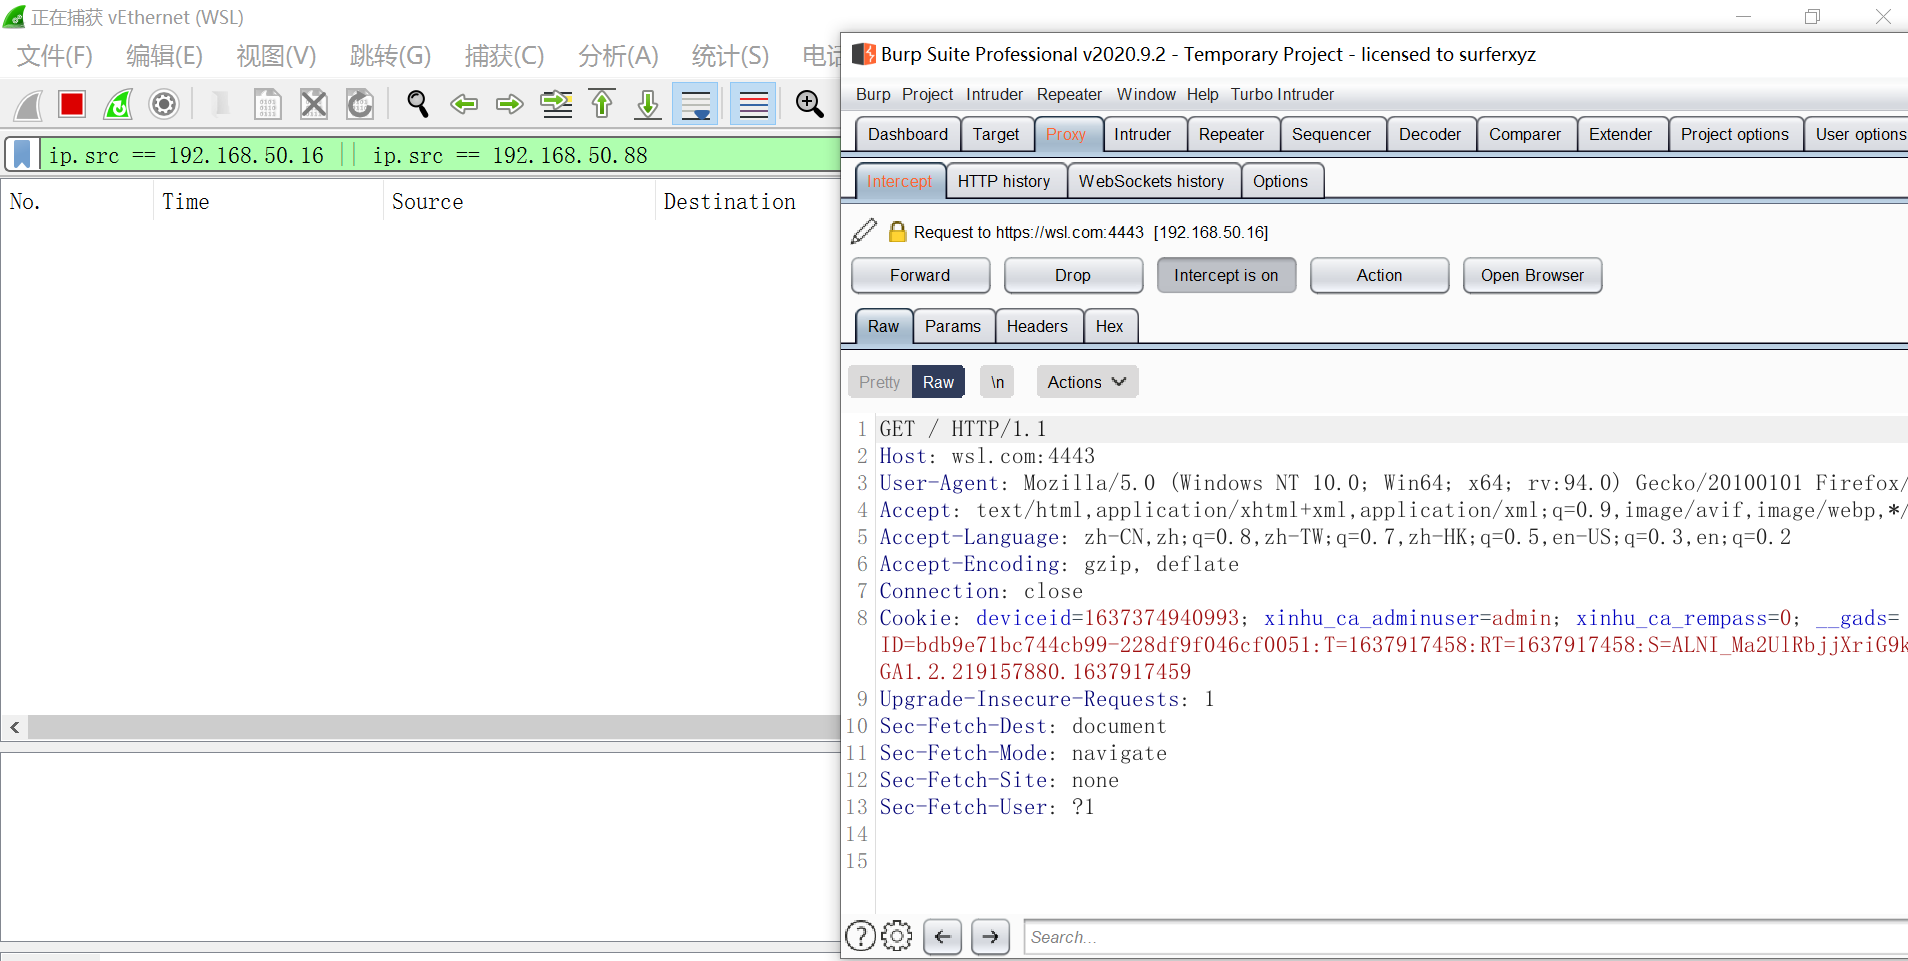
当点击 forward 之后,burpsuite 会 去完成剩下的 https 请求,并且给浏览器发送个 特殊的、伪造的 服务器证书:
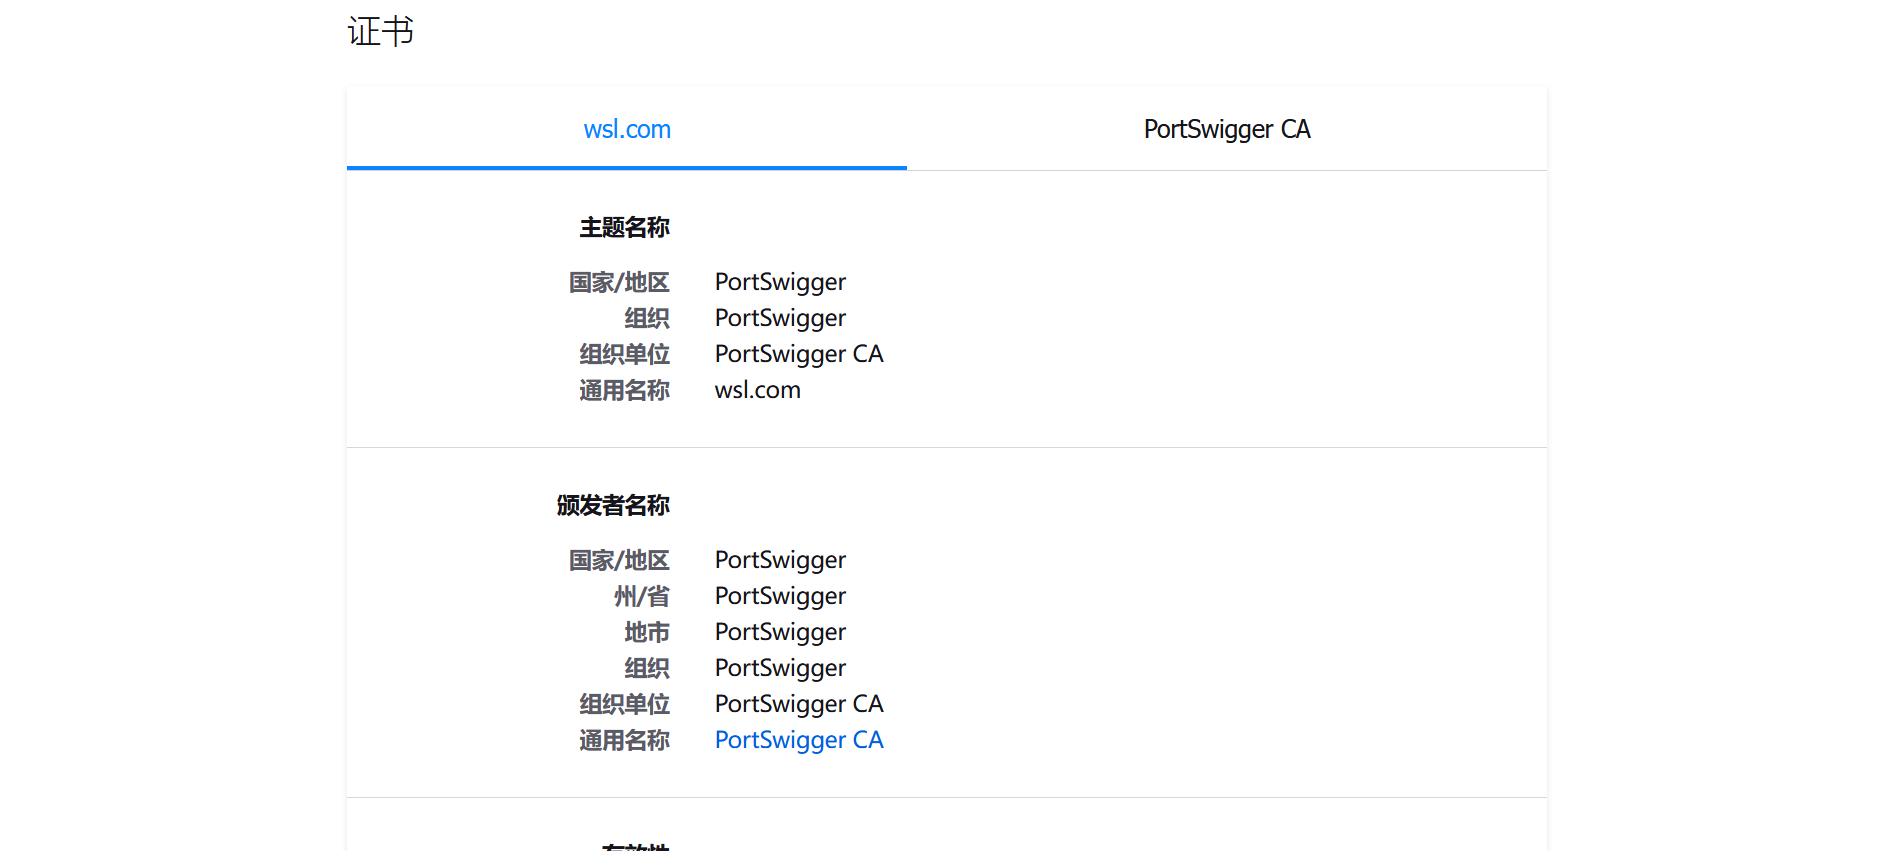
因为已经在浏览器上面安装了 PortSwigger 根证书,因而可以成功通过有效性检测
burpsuite 拿到 response 之后,也会 加密后返回给 浏览器,从而使得浏览器正常拿到回显
参考资料:
https://tiptopsecurity.com/how-does-https-work-rsa-encryption-explained/
https://blog.anvileight.com/posts/simple-python-http-server/
https://www.jianshu.com/p/1de38a3f50f3
https://blog.csdn.net/cowbin2012/article/details/100134114
https://www.jianshu.com/p/c65fa3af1c01